No Knead Recipe Variations
| Menu of No Knead Videos: | |
| ► Cranberry-Pecan |
► Seeded Sour |
| ► Parmesan-Olive |
► Steel Cut Oats |
Here are some of my favorite No-Knead bread recipes. Each is distinctly different from the others, touching on some of what's possible with this simple and hugely time saving bread baking method.
In each of the videos you will see I'm using sourdough starter as the leavening agent. The use of sourdough starter is usually my preference in baking but as the written instructions indicate, you can just as easily substitute instant yeast for the starter by mixing 1/4 teaspoon of instant yeast in with the dry ingredients and leaving out the sourdough starter entirely. It's that simple. I don't want to see anyone deprived of the luxury of this bread experience if instant yeast is your preference for leavening.
As always, feel free to play with different flour mixes and ingredients to come up with your ultimate bread masterpiece.
Please leave your comments, questions and experiences at the bottom of the page.
December 14th, 2007 Update: Check out Kendra's recipe for cinnamon raisin bread below (scroll down to her Dec. 14th, 2007 post). It sounds awesome. Thanks Kendra!
Also, see the Feb. 10, 2008 post by Joanne Polayes with her variation of the cranberry pecan recipe.
Cranberry-Pecan Extraordinaire
(makes 1 loaf)
1/2 cup (2 1/2 oz.) whole wheat flour
2 1/2 cups (13 oz.) all purpose or bread flour
1 1/2 tsp. salt
1/2 cup dried sweetened cranberries
1/2 cup pecan pieces
1 1/2 cups purified water
1/4 cup sourdough starter
(Read paragraph near top of page for instant yeast version of this recipe)
- Combine the flours and salt
- Mix the starter into the water until mostly dissolved
- Mix the water/starter solution into the dry ingredients
- Mix in the pecans and craisins
- Cover bowl with plastic at let sit at room temperature for 18 hours
- After 18 hours turn dough onto well floured surface and gently flatten enough to fold dough back onto itself a couple times to form a roundish blob. Note: This folding stage can be accomplished within the bowl, speeding up the process even further and leaving less of a cleanup.
- Cover blob with plastic and let rest 15 minutes. During this rest period, coat a proofing basket or towel lined bowl with bran flakes.
- Gently and quickly shape blob into an approximate ball and place in proofing basket or bowl.
- Cover with a towel and let rise for 1-2 hours depending on room temperature.
- As gently as possible, flip the dough into a Dutch oven or ceramic (e.g. La Cloche) baker preheated to 500F degrees and bake covered for 30 minutes. Remove cover and bake an additional 15 minutes at 450 degrees. See Great No-Knead Baking Techniques for more tips.
- Allow bread to cool completely before slicing and eating. Warning: this most difficult step requires superhuman discipline and restraint.
You may have to adjust the baking times and temperatures to adapt to the various weights and materials of different baking containers.
Seeded Sour
(makes 1 loaf)
This recipe holds a solid spot on my "all time favorites" list. It is adapted from the George's Seeded Sour recipe in Nancy Silverton's Breads from the La Brea Bakery book.
1/4 cup (1 oz) rye flour
1/2 cup (2 1/2 oz) whole wheat flour
2 1/2 cups (13 oz) all purpose or bread flour
1 1/2 tsp. salt
3 1/2 tsp. quinoa
3 1/2 tsp. millet
2 Tbs. amaranth
1/2 Tbs. poppy seeds
1 1/2 cups water
1/4 cup sourdough starter
2 Tbs. yogurt
Seed Topping Ingredients:
1 Tbs. amaranth
1/4 cup sesame seeds
1 1/2 Tbs poppy seeds
2 Tbs. anise seeds
1 1/2 tsp. fennel seeds
Combine all the dry ingredients (except the topping ingredients) and then add to that the combined wet ingredients.
The rest of the baking steps are the same as those listed above for the Cranberry Pecan bread.
As shown in the video, I coat the proofing basket with the combined topping ingredients so they stick to the dough during the final rise.
Parmesan-Olive
(makes 1 large loaf)
This recipe makes one amazing loaf of bread. It's great for special occasions, and considering the price of ingredients, you may want to reserve it for special occasions. Use fresh parmesan cheese and it's likely you will not find this loaf's equivalent in any bakery. They would have to charge too much!
1/2 cup (2 1/2 oz.) whole wheat flour
2 2/3 cups (13 1/2 oz.) bread flour
1 tsp. salt
7 oz. grated fresh parmesan cheese
2/3 cup pitted kalamata olives (cut in half lengthwise)
1 3/4 cup purified water
1/4 cup sourdough starter
Follow the same steps as those listed above for the Cranberry Pecan recipe. Combine the dry ingredients (including the cheese) then add to that the combined wet ingredients and then stir in the olives. The ingredient measurements are a little different than usual as the cheese is salty to start with and the dry mix takes more water than usual.
Steel Cut Oats
(makes 1 loaf)
It's amazing what the addition of a mere half cup of steel cut oats can do to enhance and vary the quality of a basic loaf of no knead bread. During the long fermentation period, the grains soften and swell to give the bread a wholesome and satisfying flavor and texture.
Simple enough to whip together in a heartbeat and interesting enough to become a regular in your no knead rotation.
3/4 cup (3 oz.) whole wheat flour
1/2 cup (3 oz.) steel cut oats
2 1/4 cups (10 oz.) bread flour
1 1/2 tsp. salt
1 1/2 cups water
1/4 cup firm sourdough starter or 1/4 tsp. instant yeast
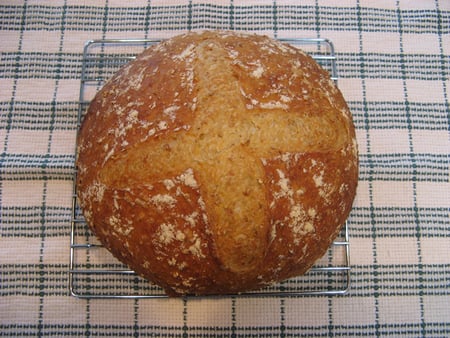
Comments on No Knead Recipe Variations »
Christina @ 2:57 pm
Oh, wow, those look great!
I don't have a kitchen scale (I know, I know) so could you take a guess at a volume measurement for the cheese?
breadtopia @ 3:11 pm
Is "a lot" a standard international unit of volume measure? Seriously, I should have thought of that. It's at least 2 cups. Maybe a little more, but 2 cups of grated parmesan should give you the appropriate (eyes rolling back in their sockets) effect.
Connie @ 3:55 pm
I have been toying with my sourdough starter you sent me a few months back and am THRILLED that I'm not alone in trying new ways to incorporate new ingredients. I have both a whole-wheat and a plain white starter that I feed and whose toss-aways have done many things, including become pizza crusts.
I cannot wait to try the parm-olive here. With the breads your starter has bred (haha) here, every day is a special occasion! - connie
Joanne @ 12:14 am
I need help in getting BIG holes in my no-knead bread. I have followed everything to the letter. I get a few big holes but not a many as I would like. Can you help. I have 85% hydration. Proof for 20 hrs. and then 3hrs.
Jerry @ 5:59 pm
Jerry:
All of the new recipes look great. I have the olives and Parmesan cheese on hand so I will be able to start the third recipe tonight. Rather than delay until my sourdough is ready, I will be using instant yeast and will increase the water to the normal 1 and 1/2 cups. I'll let you know how it comes out.
Jerry in Seattle
breadtopia @ 6:30 am
Hi Jerry. I look forward to hearing about it. I find I have to use more than 1 and 1/2 cups water with the amount of flour and parmesan listed above. But then, once you've made a few no-knead loaves it's not hard to just go by feel on the moisture level.
Christina @ 8:14 pm
Hi Eric,
I tried a variation on your cranberry variation. (I used walnuts, 'cause I had them & added orange zest and cardamom and 1 cup whole spelt flour because I like them.) It came out great, this despite the power going out while I was preheating the pot. As many have pointed out, NKB is sooo forgiving! It didn't seem to mind at all being driven across town in near freezing weather and waiting in the car while my friends' oven heated up! (And my friends didn't mind either. They devoured the part of the loaf I left with them.) Thanks again for the great site.
breadtopia @ 7:26 pm
Hi Joanne,
Sorry, I didn't see your post when you sent it.
Generally speaking the higher the hydration the bigger the holes and your hydration is WAY high. I use about 75% hydration, proof for 18 hrs and rise for 1 and 1/2 hrs. I get very big holes if I use all white flour. Specifically, high gluten bread flour. The high gluten helps with the big holes. Look for flour labeled "bread" flour. The more whole wheat flour you use the harder it is to get big holes because the sharp edges of the bran cuts the gluten walls which create the air pockets (holes).
Jerry @ 6:20 pm
I decided to delay making the parmesan-olive bread until I have a dinner party. Instead, I got the sourdough starter which you sent me really alive and made the cranberry-pecan bread. It is magnificent! It made a taller loaf than any I have made previously and the flavor is great.
I am about to try to make a sourdough no-knead bread version of Peter Reinhart's Cajun Three-Pepper Bread. The recipe is in his Brother Juniper's Bread Book. When I get it working right, I will send the recipe.
Jerry in Seattle
breadtopia @ 7:37 pm
Okay, Cajun Three-Pepper Bread sounds great. You're on record now, we'll be looking out for that!
Anna @ 7:37 pm
I am just starting with the no-knead recipe. I have a cast iron dutch oven. It is already "seasoned'. Do I need to do anything else to the pot? Oil it, anything?
breadtopia @ 11:35 am
Hi Anna. Maybe Christina knows the answer, she uses a cast iron dutch oven. Christina?
Eric
Jerry @ 4:49 pm
I adapted the Peter Reinhart recipe for Three-Pepper bread. It came out very well.
Find this great recipe here: http://www.breadtopia.com/sourdough-starter-bread-recipes.
Christina @ 12:54 pm
Hi Anna,
If your dutch oven is already seasoned, then you don't need to do anything else. Amazingly, the bread just doesn't stick. If a slight film of oil remained on your dutch oven after the last use, you may find it smokes a little during the preheating stage, so you might want to crack open a window just in case. And have fun with the NKB–it's downright addictive!
Joanne @ 2:21 am
Thanks for the information and suggestions but I only use King Art unbleached white bread flour and I am still not getting large holes. The dough is very wet with good hydration. I do get one or two but not enough for me. Am I proofing to long? (18 to 20 hrs.) I do have a bit of trouble getting it out of the basket into the hot pot it sticks a little. Could the stretching that occurs as it comes out of the basket cause it to not have big holes because it is being disturbed to much? The crust is fine and the taste is good it is just missing the big holes. I don't want to give up on this and am hoping someone can shed some light on my problem. Thanks, Joanne
breadtopia @ 6:55 am
Hi Joanne:
Maybe others have some ideas, but for the time being here are some more of my ramblings…
King Arthur makes a flour specifically labeled as "Bread Flour". Last time I saw it, the 5 lb bag had blue coloring at the top and bottom. Maybe it's not carried so widely in stores, but any brand labeled as "Bread" flour should have a higher gluten content which might make your large hole quest a little easier to achieve.
I could easily be overlooking something more obvious, but besides the high hydration, I think it may really help if you can manage to move the dough around with minimal disturbance. The holes are carbon dioxide gas bubbles, a product of fermentation. The term "degassing" comes from punching down your dough but would occur to some extent anytime you disturb your dough. In many recipes, degassing is called for as a necessary step in the baking process. In this case, you may want to minimise the disturbance to minimize degassing. Try the technique described in the article "Great No-Knead Baking Techniques" where you allow the dough to do its final proof in a parchment paper lined basket and then just lift the paper out with the dough still in it and gently lower it into the Dutch oven, parchment paper and all.
Do try shortening your proofing time. Not only the long (18 hour) part, but the final proof too. There's an optimal time to let dough proof that varies all the time depending on temperature and other factors. After that (sometimes elusive) optimal period, dough will start to deflate under its own weight. For the sake of experiment, try 16 hours on the long proof and only an hour to an hour and a half on the final proof. In your earlier post you mentioned a 3 hour final proof. That's too long. You can always increase the time again later to maximize the flavor development.
I hope this helps. You are absolutely REQUIRED to report back here with your progress… or lack thereof.
Eric
Christina @ 11:02 am
Hi Eric.
Here's a couple variations on variations we've been enjoying.
Tutti Fruiti
To regular no-knead dough add the finely grated peel of 1 orange, 2 tsps. unrefined sugar, and up to 1 and 1/3 cups dried fruit. (We used whole cherries, chopped pineapple, minced candied ginger, and golden raisins.) The dough can be on the wet side as the fruit will absorb moisture. Rise and bake as usual. (Beware, the sugary fruits will caramelize if they touch the pot directly, so use a pot that cleans up easily and try to form the dough so that not too much fruit is exposed.) Makes a sort of light-hearted cousin to a stollen.
Whole Grain Spelt
Make the dough using 3 1/2 c. whole spelt flour, 1 3/4 tsp. salt, 1/3 c. starter and water to 1 2/3 c. Stir in more flour if you can–the dough seems to gain quite a bit of moisture as it rises. Monitor the volume of the dough rather than watching the clock. I found I had to cut my rising times quite a bit. For the final rising put it in a greased bowl that has been well dusted with rice flour. (If you leave it on a flat surface it will just ooze as it rises.) Use a bowl that has a diameter slightly smaller than the pot you'll be baking in. It won't rise as much as a loaf made with refined flour, but should increase by 2/3. Dust the top of the dough with rice flour immediately before baking so that when you (carefully) flip it out into the pot you'll have some there to prevent sticking. Bake as usual. Makes a flattish loaf–not as fluffy as those with some refined flour, but good texture with smallish air holes throughout and great taste.
If anyone comes up with a way to increase the fluffiness of whole grain NKB I'd love to hear about it!
happydog @ 7:22 pm
I'm so thankful I found your site, I've learned so much! I have a couple questions if you have time. My kitchen is 80 degrees. Should I proof for a shorter time? If so how long or what should I look for? Often my dough seems overproofed and reeks of alcohol. When it does that can it be salvaged or should I just throw it out and start over?
Often it rises high but sinks as it bakes. What causes that?
This one I hate to ask but - I've made the original no-knead bread a couple of times in a hot pot and had the crust come out very tough, thick, and hard (think turtle shell)can I bake these in a traditional loaf pan or is the hot pot an essential element?
Thank you very much, I'm planning to try these three recipes in the next day or two. I have high hopes!
breadtopia @ 10:21 am
Hello happydog!
Yes, try proofing for a shorter time. I don't know how much shorter, just try something and see how it goes, then take notes and try again. The sinking while baking sounds like over proofing as do the other symptoms. It would sink when the yeast has consumed its available nutrients and starts to die off before you're ready to bake. The trick, which comes with practice, is catching the right time to stick in oven based on just watching how quickly the dough rises and the volume it rises.
Are you using commercial yeast or sourdough? The biggest single mistake people make is not feeding their starter often enough or freshening it up prior to baking. A good healthy starter is really important in order to get good results.
I think it is important to use a closed heavy pot like a Dutch oven or clay baker for the no knead method. Covered clay bakers are great and less likely to create turtle shell crust.
MrO @ 6:16 pm
What a wonderful site.
The breads and tips posted on this site is really impressive, especially all the no knead recipes. However I just need a little help in perfecting this wonderful bread. I have tried many and all sorts of flavours and they all come out wonderful..(Beautiful crust, great flavour, awesome colors and lovely even holes through out.) The problem i have even with all these great results is that it seems a little wet, heavy, or some would say doughy. I have tried longer times with cover on and have also tried longer times with cover off. Ive tried cutting the ends to let steam out, longer cooling down periods in and out of oven, ive tried whole wheat, semolina, plain you name it ive tried it and its such a shame because everything else about the bread is AWESOME.
PLEASE HELP BEFORE THE LOCAL GROCERY STORE STOPS ME FROM TAKING ALL THEIR FLOUR
MRO
GOLD COAST AUSTRALIA….
breadtopia @ 9:13 pm
Well… if you hadn't explained all your attempts to solve your problem, I would have simply suggested that the bread needed longer cooking. Every body's ovens have somewhat different baking characteristics. I actually think it's still possible that longer baking may still be the answer. If you haven't done this yet, maybe try baking quite a bit longer and possibly baking quite a bit longer at a lower temperature so the inside crumb has longer to bake before the crust burns.
A problem like this can sometimes be more easily solved with an instant read (probe type) thermometer. Wet dough breads should reach about 205 degrees Fahrenheit (~96 C)internal temperature.
The only other thing I might suggest is cut back a little on the amount of water you are using in the recipe and see what happens.
Another idea is try an altogether different type of bread recipe just to have the experience of getting the results you want. Of course there are a million recipes that can be found on the net.
I think if you hang in there long enough, and your grocer doesn't ban you from shopping there, you'll hit on the right combination of factors sooner than later. Maybe bread just bakes differently in the southern hemisphere ;).
MrO @ 9:54 pm
Thanks so much for the speedy reply….i have increased the baking time by ten minutes already and still with no succeess but maybe it just needs a little longer here at down under…i will try to increase the time and cut back on water..i will give you somew feed back asap…thanks and well done with the site.
MrO
Carol @ 9:52 am
Hi Mr.O:
I had that problem with my first loaf. I found that baking the bread to an internal temperature of 210 degrees solved my problem. Everyone's water, flour, oven, etc. is different, but it may be worth trying for you. Carol
MrO @ 5:59 pm
Thanks carol,
I think just getting a thermometer will solve the problems without having to experiment with water and temperature etc. Thanks again for the tip, I'll post some feedback.
MrO
MrO @ 7:00 pm
Hi Guys,
Just got the tools and have just started initial proof of the parmesan olive bread but i have a question in regards to the extended baking time. Considering that i am only trying to get a dryer or hotter center (205 - 210 f), should i extend both parts of the baking meaning top on and top off or should i only extend 1 part of the baking.
breadtopia @ 5:29 am
I would extend part 1, then if at the end of a "normal" part 2 your bread doesn't pass the temperature test, put it back in for an extended part 2 for a few minutes.
I sure hope this works for you. You're brave to attempt the parmesan olive bread while still in test mode.
Looking forward to hearing of your progress (although I suppose this reply may be too late to have been of much use).
Eric
laurie @ 9:45 pm
Does anybody have the Jeffery Steingarten no knead bread recipe from Vogue magazine? I accidentaly threw my copy away!
breadtopia @ 4:40 am
Hi Laurie.
This is it:
3 cups bread flour
2 tsp. fine salt
1 tsp. instant yeast
1 1/2 cups water, at room temperature
Coarse wheat bran (for preventing sticking to towel during rise)
Bake in covered pot at 500 or higher for 30 minutes and then uncovered for another 20 to 30. Cool until barely warm.
Good (and funny) article. Many detailed and helpful tips too. One in particular that addresses problems with the bottoms of loaves burning - place the baking pot on the highest rack possible and/or his solution is to insulate the bottom of the pot with silicone disks that are sold as hot pads.
Ann Timms @ 8:14 pm
Hi Eric, the steel cut oats version is fantastic! I think I could have added slightly more salt as I'm using kosher salt, but otherwise the flavor and crunch are wonderful. I used yeast but will try it with my starter next time. I am getting MUCH better about being patient and letting the dough proof, and I did buy an instant read thermometer which read 205* - no more gummy crumb. Thanks again, Ann
laurie @ 10:22 pm
Thank you, thank you!!!!
drtisbeter @ 9:53 am
Questions regarding the "Seeded Sour";
I would like to make this bread with some different seeds like flax. Can flax be used as is or should it be cracked/boiled/soaked first???
The other question, what is the purpose of the yogurt in this recipe?
Thank you much, and thanks for a great, informative site. A great help.
breadtopia @ 9:30 am
Hello drtisbeter,
My only familiarity with the use of flax seed comes from Jeffrey Hamelman's "Bread" book where a few of his recipes call for using flax seed in a cold water soaker before baking. The seed soaks for several hours before mixing into the dough. This makes the seed more palatable plus the seeds don't rob moisture from the dough when mixed in.
I'm not sure why the yogurt as opposed to just milk for example. Maybe yogurt, like buttermilk, has some small leavening component. Or maybe it adds a bit to the "sour" thing.
Have you baked it yet? I love this bread!
drtisbeter @ 10:43 am
Thanks, I just made and ate your seeded sour with a little different seed mixture; amaranth, millet, poppy and sesame The same for the topping but with the addition of flax seed.
I forgot (not intentional) to put the yogurt in.
It is deffenitly the best bread I've ever made, it was delisious and didn't last very long.
Will be making this again for sure with some variations –>add yogurt maybe
One question though; at my local health food stare (40min drive)they sell some whole barley, buckwheat and spelt, could one add these to the dough? What I'm really looking for is cracked wheat (commonly use for bread making in my native Holland)
thanks again
breadtopia @ 10:53 am
Sure. The more you experiment, the more you'll find how far you can go with different grains before you end up with something significantly different tasting and textured bread. But you might like what you come up with better.
To me, half the fun of bread baking is experimenting and seeing what you come up with.
Regular wheat flour is the grain naturally highest in gluten, which is nice for bread baking, but of course people bake with everything and I understand bread in Europe is usually far different (and healthier) than what is common here.
drtisbeter @ 9:59 am
Just finished the steel cut oats version, with sunflower seed in the dough and as topping => truly delicious
Charlie @ 11:47 am
What size cast iron dutch oven is best for a single loaf?
breadtopia @ 5:48 pm
Many like 4 qt. size.
judy @ 2:56 pm
Is there any way to make dinner rolls from the no knead bread method?Thank you.
breadtopia @ 3:25 pm
There is. Here's a link to a recipe that I plan to try some fine day.
Dec 6 2007 Update: Link no longer functional, so I removed it. Eric
Brian Avery @ 7:15 pm
I forwarded my no-knead "recipe" but apparently I didn't send it in the proper manner to be posted. I use quotes around the word "recipe" because I don't have definite quantities to recommed. Just experiment and adjust for your taste.
Actually, now I have two "recipes":
1: Try adding some grated cheddar cheese (or cheese of your preference) and a couple thinly sliced jalepeno peppers. If you like it a bit hotter, try three or maybe even four.
2: Grated cheddar cheese and fresh rosemary added to the basic no-knead recipe is also very delicious.
I haven't tried it yet but I think a little grated cheese spinkled on top of the loaf prior to baking would be very good.
breadtopia @ 8:58 pm
Hey Brian, those sound like awesome variations. Thanks.
Brian Avery @ 11:02 pm
In my earlier post I forgot to mention that I added thin slices of red pepper about an inch long(not hot)to the bread with the jalepeno peppers. There's no noticeable taste difference but the bread looks nice. I would have preferred to simply use fully red-ripe jalepenos but I had only one small one in the garden.
Hedy @ 2:07 am
Firstly, I want to thank you for sharing your knowledge and being so generous and forthcoming with such valuable information. Such an easy website to remember,I have passed you on to friends.
I have been making Focaccia bread with my water sprayer on a stone for years with many compliments. I tried the no-knead plain bread as an experiment, not thinking if would actually work. I brought the loaf to the Sabbath (Friday night) meal to break bread, making all sorts of apologies that it propably wouldn't be good. It blew everyone away. We all could not stop raving about the bread. For that, I thank you. The crumb was fabulous as well as the taste. We were sorry that there was only one loaf. Can I double the recipe in the same pot? Will it bake through or will the dough remain wet and doughy (yuck)?
By the way…I forgot to use purified water and used tap.
breadtopia @ 5:13 am
Hi Hedy. It's my pleasure. Thank you for sharing your story - I love it.
I'm not sure what you'd find with doubling the recipe in the same pot. My guess is it would change a lot of things, perhaps significantly. You would probably have to lower the temperature and bake a little longer to prevent the crust from burning before the inside finished baking. Then you might loose some of the oven spring and crusty crust which are hallmarks of no knead bread. Or, I could be completely wrong :).
I haven't checked to see if two 4 or 5 quart Dutch ovens would fit in a standard 30" oven at the same time. When I need 2 loaves in one bake, I use a round and oblong La Cloche simultaneously.
Hopefully, others have ideas that address your question.
Herb @ 4:46 pm
Eric, thanks so much for your great website!!!
Bought a cast iron dutch oven…2 quart size and it is perfect for one loaf. The lids that usually comes on these dutch ovens are flat, so picked up a glass round top lid. Kamart or your local Goodwill type stores. Found my dutch oven at local consignment store, ($12.00) it had never been used. No problem with sticking. The last time I baked bread, made two recipes. Made one recipe and 1 1/2 hours later started the other one. Worked out great as I only have one dutch oven so when the first loaf was finished baking the second loaf was ready to put in the oven. Saves on natural gas too as only needed to heat oven once.
450 degrees for 30min and 425 for 15 min. Great bread! I have been baking sourdough for several years and your no-knead sourdough is one of the best!
breadtopia @ 5:32 pm
Hi Herb,
Thanks for the good info and tips. People are frequently asking what a good size is for a Dutch oven.
Hedy @ 12:41 pm
Made a no-knead bread again…with great success. I added about 2 cups of WW flour. I make my no-knead focaccio on a pizza stone…and spray with water every 5 minutes at least 3 times. I put garlic and chopped parsley with olive oil on top. It is devine. This has been my signature bread for years. Now I want success with sourdough baking and whole grains.
Would you mind ….
Just a couple of quick questions that maybe you can only answer.1) Do you use a refreshened sour dough starter immediatley after adding a feeding? or do you let it sit around for a few days or hours.
2) I am reading the Reinhart book on whole grain baking…it is a lot of info…like a science class…What is the difference between a biga, soaker and mash…as opposed to a starter? What is a mother. He is too scientific for me to remember.
When you have time to answer…no rush. Thanx
Hedy
Herb @ 1:18 pm
Hedy, As for the sourdough don't get too involved. Would advice KISS. If for some reason I do not have an active sourdough going, do this:
Pinch of Active dry yeast ( 1/8 tsp), stir into 1/4 cup of water, let desolve add 1/4 cup of flour, + or - to make about the thickness of pancake batter. Let set out at room temp.
Add flour and water every day for several days, 3, 5, 7, ever how many you want. Then make bread, then add flour and water to sourdough starter and put in frig. If I forget to take the starter out the night before, just mix with warm water that you have measured out for the bread. Feed once a week or so. I use whole wheat flour to make starter, just feel there are probably more good things in ww to help the starter. Most important thing for good bread is good fresh flour. Try to find a mill and buy from them.
Dave Reich @ 9:58 am
For anyone looking for an appropriate pot, I have used a round 4 quart crock pot with great success. Since their lids are not oven proof, you can simply use a cookie sheet or foil for the covered portion of the baking.
For a larger loaf, I have used 1.5 times the ingredients in a 6 quart oval crock pot insert. Again, the results were great.
Laura @ 7:57 pm
I am a new convert to this type of bread making. Can any bread recipe be a no-knead recipe? I have an old favorite that had warm milk and melted butter and an egg in it. Sounds like I might kill all my dinner guests if I did it the no-knead way. What do you think?
thanks, Laura
breadtopia @ 8:16 am
Hi Laura,
Not every bread recipe is suited to no knead, but you can certainly give yours a try, probably best tested on yourself first ;).
Laura @ 9:06 pm
Okay. I'll be the guinea pig and let you know. I made the cranberry/pecan for thanksgiving and it was a huge hit. Then I made a white bread with 1 T. fennel seeds and some olive oil (I don't know how much because I didn't have much left) and that was delicious. So much fun!
thanks, Laura
Hedy @ 5:47 pm
Just thought I would let you know what happened to my last no-knead experience. I put a whole wheat sour dough starter and part WW and King Arthur White Flour recipe together on Wednesday morning before I left for work (7:00 a.m.)…All is going a long great. By Thursday evening I had a great sour-smelling, puffed up no-knead dough. This whole time I have not refrigerated the dough. On Friday afternoon when I wanted to make my bread…I noticed no sour smell. In fact no smell at all. I found that quite strange. I tried to pick up my dough to form in a floured cloth and the whole dough just disintegrated in my hand. There was no elasticity at all.It was sticky and grainyish. Really weird consistency. I tried to bake a small amount just to see if if would bake at all in a normal hot oven. It baked flat. I tasted it. It tasted sour, not in a good way…but like it was spoiled.
Conclusion: I guess…less is best, less time that is, instead of trying to make the sour time longer, I overdid it. I think one can not do more than 18 hours…or do you have to refrigerate the dough and for up to how long can dough ferment and not fall apart? What do you say? Would love your feed back. I thought I should share this outcome, in case someone else thinks they can over-sour a dough too.
Thanks again for all your help.
Hedy
breadtopia @ 7:02 pm
If it sits out too long the acids in the sourdough break down the gluten. Plus the sourdough simple exhausts its food supply. I think that's what happened in your case. If you want to extend beyond 18 hrs, you can refrigerate after mixing and take it out some time before baking to finish proofing. If you're going to deviate from the recipe a lot, just experiment with the refrigeration thing and you'll come up with something that works.
Shelly @ 3:48 am
Hello Eric,
I made my first loaf of no knead bread with whole wheat flour added. I tried the standard recipe & had great success. For the whole wheat variation I used 1 cup of whole wheat flour with 2 cups of white & followed the directions. My loaf came out fairly flat this time. Is that normal for whole wheat? The only thing I did wrong was let it rise for 22 hours instead of 18 (fell asleep!). Would that have made the difference? I also sprinkled both the top & bottom with a fair amount of cornmeal to prevent it from sticking to the towel during the 2nd rise.
In any event, it tasted fantastic regardless of it being a flat loaf of bread (looked like biscotti when cut) so no harm no foul.
Thanks for your wonderful website & all the videos. It's truly helpful to us amateurs out there.
Regards,
Shelly
Snohomish, WA
breadtopia @ 11:08 am
Hi Shelly,
Sounds like an extra 4 hours of sleep is a nice trade off for a flat loaf that still tastes good ;).
The 1 cup of whole wheat will usually keep you from getting quite as nice a rise as from all white flour, but it wouldn't usually make as big a difference as you saw. It probably was the additional proofing time. The starter consumed too much of the available nutrients and so there wasn't so much left to give it that "oven spring" boost when you put it in the oven.
Sometimes you can get by with extra time if the room is real cold but I usually don't even wait the whole 18 hours. For me 17 works about the same. After a bit, you'll get a good feel for what works best in your kitchen.
Glad you're having fun with this!
Eric
Shelly @ 3:43 am
Thank you Eric. You should have your own tv show. I can't believe the Food Network hasn't snatched you up yet.
Shelly
Russ @ 1:47 pm
Trying out my own variation on the parm-olive bread, it's proofing as we speak. I've varied in that I used Mizithra cheese in place of the parmesan and chopped up my kalamatas because I like that cheese and for the sake of getting at least a little olive in every bite.
A thought on the question above about why yogurt rather than milk in the seeded sourdough recipe: Maybe because of the long proofing time at above refrigerated temps, since yogurt is already "soured" it seems it would be less likely to spoil as plain milk would be likely to (Isn't the lactobacillus in yogurt and sourdough alike said to help keep other, unwanted bacteria controlled?).
Kendra @ 4:31 pm
I love cinnamon raisin bread for breakfast, so I decided to tinker with one of the no-knead recipes to see what I could come up with. Here's what I did:
10 oz. bread flour
3 oz. white whole wheat flour
3 oz. steel cut oats
1 1/2 t. salt
1 t. cinnamon
12 oz. water
1/3 cup starter
1/2 cup raisins
1/2 cup chopped walnuts
This is basically a combination of the steel cut oats recipe and the cranberry pecan recipe. I just changed out the fruit and nuts, added some cinnamon, and increased the starter a little bit.
It turned out beautifully. I got a wide open, irregular crumb, nice crunchy crust, and huge oven spring. It tastes heavenly. I don't think there will be any left over for breakfast!
Take Care,
Kendra
breadtopia @ 8:46 pm
Thanks much, Kendra. Your recipe sounds wonderful. I've printed it out to try this weekend. I was just thinking of making cinnamon raisin buns, but this looks better. Great timing!
Eric
Kendra @ 3:25 pm
I'm thinking of trying this recipe again, but adding some butter and honey so that the crumb is softer. It would also be nice if it lasted a day or two longer before going stale. If I do that, I need to lower the temperature, right? Any recommendation on time and temperature to use?
breadtopia @ 7:11 pm
That sounds like a good idea. I'd probably try around 450 with the lid on instead of 500 to start with and bake an extra 5 minutes before checking with a thermometer. That's just a rough guess of course.
I did make the bread today and it is very good. I couldn't resist sprinkling a cinnamon/sugar mix over the dough before that final fold to give it a swirl of sweetness. Otherwise, I followed the recipe exactly. Turns out I don't think I added enough extra to make much of a difference.
I'm looking forward to hearing how it goes with some milk and lower temp. I'm probably thinking the same as you - maybe cinnamon raisin bread is better a little on the softer side.
laura @ 7:03 pm
It's winter here and cold, outside and in. I prefer to wear more clothes than run heated air, so how do I keep my dough warm enough during the resting/rising periods? My house is usually around 60 degrees.
breadtopia @ 6:58 am
Hi Laura,
You could still let in rise at 60 degrees and just give it more time. Some people (like me) might even prefer this as, generally speaking, the longer the rising period the better the flavor.
But if that doesn't work for you or time is an issue, many people let their dough rest/rise in their ovens with just the oven light bulb on. The light bulb generates a decent amount of heat. You can experiment with that. If the oven seems to be getting too warm, allow a tiny opening in the door.
Jill @ 5:08 pm
How do I adjust the no knead recipe for high altitude? I am at 7200 feet, by the way.
Thanks for your help!!
Doris @ 9:33 am
I have found that it makes a huge difference as to what kind of flour you use. White all purpose makes many large holes compared to wheat flour that produces fewer. Also I have tried several brands of white flour and they all produce different results. Try useing different flours til you get the result you want. Hope this helps
Harvey Cohen @ 9:55 pm
The basic no-knead recipe says, "…2 cups (10 1/2 oz.) white bread flour…" while the steel cut oats recipe says, "…2 1/4 cups (10 oz.) bread flour". I realize it is possible to measure flour so that 2 1/4 cups weighs less than 2 cups, but why do you want to?
breadtopia @ 9:41 am
Sometimes I like to add a little more flour because I find it gives me a better rise in the bread without taking away much from the open crumb.
Roberto @ 1:31 pm
Hello,
I have a question on the baking temperature…when I make my NKB, I follow Lahey's recipe (from the NYT article), which calls for pre-heating the container in the oven at 450F, baking at 450F for 30 minutes, then removing the lid and baking for another ~15mins at the same 450F, and my bread turns out great (at least I think so :)!)
The recipes here call for 500 F, then lowering the temp to 450 when removing the lid (the recipe in Feb08's edition of Cook's Illustrated also calls for these temperatures)…what is the difference? Should I change my technique? What would I gain?
Thanks!
R
breadtopia @ 1:38 pm
Hi Roberto.
You might get a thicker and crispier crust at the higher temperatures. Maybe try it both ways and see which way you prefer.
Molly @ 3:36 pm
I have just made my first bread in the La Cloche. I just got my Cloches and starter this week. I used the yeast method for the Cranberry Pecan, which was because I had not activated my starter the night before and was still building it up. So, it looked great until i started cooking it. Completely burned on the bottom. Was I supposed to season the La Cloche first? Or is my oven just entirely too hot. I followed the recipe exactly (not really like me, but since it was the first time, i thought i had better be safe rather than sorry!). The only thing that was different was that I let it rise only about 16 hours. It looked completely ready and I was afraid the yeast was going to start breaking down as i had read in other posts. Honestly, I could smell that it was burning, but thought (hoped) it was just the cranberries. I have mixed up basic sourdough bread to bake tomorrow morning. Pleae let me know if there are adjustments you think i need to make…
thank you so much for everything. WHen i found this site i was actually looking for a recipe for my favorite cranberry pecan bread from Bread & Co. in Nashville, and all i was finding was quick breads. We have moved to a small, rural area and have no artisan type breads near us anymore. I used to bake a sourdough bread that was in basic loaves (used potato flakes in the starter) and was more of a sweet sourdough with a very light texture. I lost my starter in the move! oh, well!
breadtopia @ 4:27 pm
Hi Molly,
I'm starting to think maybe there's something about the cranberry pecan bread that's more prone to burning on the bottom as it seems I've heard this more than once before. But I know it's not necessary that it happens since it doesn't happen to mine and most others. Sooo, one thing you can try is see if you can move the oven rack up a level or two. I've heard that helps. Otherwise, maybe your oven does run a little hot and you just have to lower the temp some. It can really help testing the bread with an instant read thermometer so you know you're taking it out at the right time and not leaving in any longer than necessary. Once the inside hits 200-205, it's done.
You'll get it, it's just going to take a little playing around. This bread recipe is totally worth the experimenting with your oven until you have it down.
Sheila @ 5:19 pm
I made the cranberry-pecan bread in my new dutch oven yesterday, and even with three grandchildren around, it turned out fantastic. The crust did get a little too brown, and I will raise my racks as high as they can go and still fit, next time. It was my first no-knead experiment, and I was really impressed with the rise, the crumb and the flavour. I may have to throw out my almost new package of instant yeast. Thank you for another amazing recipe.
Beth @ 6:56 pm
Eric, It's been a while since I've visited the site, but I'm back into this again! I wondered what you would suggest using instead of amaranth in the Seeded Sour Bread. I can't find it here.
Robina McCluskie @ 5:02 am
Hi Eric can you tell me would i be able to retard the pecan and cranberry and the steel cut oat bread in my fridge say eight hours or so after shaping my time table is all over the place so i might not be able to bake when my bread is ready and i would possibly have to wait a while maybe 8 or a bit longer Robina
breadtopia @ 7:36 am
Absolutely. Using the fridge to slow things up to adapt the baking schedule to yours is a great technique. Just know that it doesn't stop the rising process, it just slows it a lot. So when you take it out of the fridge, it may not take quite as long as usual to be ready to bake.
breadtopia @ 7:41 am
Beth - sorry, somehow I missed your question. I wonder how noticeable the amaranth is in the recipe. So I think if you just substitute one or more of the other grains, like the quinoa and/or millet, you'll be fine. I would probably use a Tbs. of each in place of the amaranth. For the topping, just leave it out. It won't matter.
breadtopia @ 7:41 pm
Joanne Polayes emailed this variation of the cranberry pecan recipe. Sounds great.
She bakes it her oblong la cloche.
heather @ 12:01 am
Hi there. I have been messing around with making no knead bread using 2/3 whole wheat and 1/3 white flour. It tastes great and has a great crust, but no matter how much I grease (crisco) my Creuset pot, the bread sticks to the sides and bottom especially. It also stuck when I dusted the pot with flour. I tried tapping the bottom, using a cake blade to get it to release, to no avail. I have to cut into the loaf and yank it pretty hard before it will release. Then it gets gummy cause I cut into it; vicious cycle.
Anybody know why this is happening? I'd love to not almost die every time I bake this bread; that hot heavy pot is quite dangerous!
Thanks,
Heather
Jim Bernhardt @ 9:30 am
I would keep following your recipe but, transfer the dough to either parchment paper or foil and let it rise in a bowl, then when your ready to bake lift dough out of bowl and place in your creuset pot and bake. When it's finished lift out of pot. Don't know if this helps but that's what I would do.
Herb @ 10:59 am
Heather
Jim's post is right on! I bought some "No-Stick" foil, which really works good. Using this method you lift the foil and dough from the bowl it has risen in, place into baking creuset or dutch oven and remove without danger of burning yourself. Just cut the foil long enough to provide some to get a hold of.
Barbara Ross @ 3:20 pm
Heather, I had the same problem. I had the dough not rising but spreading on the second rise, so I finally gave up and put it in a bread pan, let it rise there and baked it. I just took it out and it would NOT come out of the non-stick Caphalon bread pan! I had to pull and it broke in half, half of it still in the pan. Now, when I use 100% whole wheat or combo of whole wheat and other good grains (no white flour) I never had the problem of it sticking or of it not rising. I'm going back to that and not using any white at all. Try it. It should come off like nothing.
heather @ 4:52 pm
Thanks everyone. I will try the foil and no white flour method.
Lori O @ 1:56 pm
Do you have to grease the clay pots? I have a glazed clay baker (Braten Topf). Thank you.
Jo-Ann @ 6:56 pm
Hi
Eric, THANKS SO MUCH FOR ALL YOUR HARD WORK!!!
Just got an Sassafras Oblong Baker as a gift and am wondering about a couple of things.
1. should I pre-soak it before putting in the oven for the first time, or any time
and
2. there are differing opinions as to whether to pre-heat the baker IN the oven or use it cold in the pre-heated oven.
I have used cast iron pots and home made la cloche tops and I did pre heat them in the oven.
I found that using 1-2 tsp of vital gluten and 1 tsp of lecithin does help the dough rise nicely.
My crusts are crunchy and both my husband and I love the crust and the chewiness of the bread.
I maintain the crisp crust by putting it in a paper bag[after it has completely cooled]. If you like chewy and a softer crust, then use a zip-lock bag.
Either way, it doesn't last long.
I love this site and all the user comments.
I have baked only about 5-6 loaves of NKB, but, its the only way to bake. So many varieties, so little time..
thanks to all contributors.
jo-ann
breadtopia @ 6:37 am
Hi Jo-Ann,
You're welcome!
I wouldn't pre-soak the cloche. I don't think it adds anything significant (like more steam). It's more likely to increase the chances of cracking if it's not thoroughly dried before using again.
If I'm understanding your second question, NEVER put a cold (room temp) cloche in an already preheated oven. Way too high a chance of cracking from the thermal shock.
Bring it up to temp with the oven. You can have the dough in to start will or place the dough in the cloche after it's fully preheated (my preference).
Scott @ 7:50 am
Hi!
When I used to live in Germany I ate a lot of potato bread. Does anybody have any idea how either the NKB or ANKB recipe could be adapted for this? Instant potatoes? Actually mash some boiled potatoes up and use the water from the potatoes in the bread? Those were my ideas, but I have no idea how much. Would you want to include some wheat flour? I was hoping someone would have some input before I start experimenting.
Thanks!
Scott
nick @ 8:51 am
Hi Eric,
Thanks for the website and recipes. My sister in Germany sent me the nkb video, so I thought I'd give it a try. She still uses the starter I gave her about 7 years ago. Apart from being a bit gummy inside, it was great.
English ovens mostly only go to 220C, a few will go to 250C so I guess that was the cause. Subsequent batches have worked very well, I experimented with extra time, and slightly lower hydration.
So three scant cups water to six sort of heaped cups flour to produce a double quantity. This get cooked in an oval casserole - an unenamelled cast iron lidded pot I picked up in Germany.
I usually use the sourdough starter which I made from the instructions you sent me. This has ended my sourdough drought. For years, all my starters and attempts to breed one ended in failure, and was reduced to buying fresh yeast from German supermarkets, bringing it home and freezing it.
For all the people who haven't tried sourdough bread, especially the nkb method should give it a try, once the starter is going, it is, if anything even easier.
thanks again
yours
nick
Rick @ 9:55 am
I know you've said that 205 is the right internal temp for eliminating the gummy crumb. Being at 5,000ft in altitude, would I make an adjustment for that? Water boils at approximately 204 here so would I subtract the 8 or so degrees and check internal for 197?
Thanks for a great site!
John Summers @ 2:27 pm
Hello Eric,
I love your videos. I was successful in making my own starter even though I bought yours. Today will be my first attempt at sourdough bread. I have chosen to use the Steel cut oats, the Cranberry Pecan and a variation on your Olive loaf. I decided to do a Sharp Cheddar and green onion loaf. There is a question I have on it. Mine seems very sticky and rather soft. It doesn't seem like it is firming up very well. I will let you know later if it bakes up OK though. I had to use a lot of flour to keep it from sticking to my hands as I tried to form a ball and put it in my proofing basket. Many of the breads I have made here seem a little too wet. I don't have a scale so I use the measuring cups. Any advise would be appreciated. Thanks again.
John Summers in MO
breadtopia @ 9:01 am
Hi Rick,
Sorry it took so long to respond. I've been gone for a few days.
I'm really ignorant about baking at altitude (a lot of other things too, but we'll stop at this for now). What I've read is that generally speaking, higher altitudes may require baking at higher temperatures and shortening the baking time accordingly. BUT, there are no set rules for this, each recipe is different and you just have to monitor the progress of the baking and resign yourself to a trial and error method.
I've heard from other bread bakers living at high altitude who have followed the normal instructions for the no knead bread and had great results.
Even the 210 degree rule is not a strict one. Bread can be done anywhere from 195 to 210.
So probably the best suggestion I could think of making is follow the recipe as is the first time and see how it turns out. Then take a wild guess at an adjustment, if necessary, and try again.
breadtopia @ 9:39 am
Hi John,
As I mentioned to Rick above, I was away for a few days. How did your bread turn out?
The no knead dough is very sticky. I'm not sure how anyone could work with it by hand without it sticking like crazy. So I'm curious to know how yours baked up.
Rick in CO @ 11:39 am
Thanks so much for you information, Eric. I did try it at the normal recipe and times but it came on a bit more gummy than I thought, hence the question about if I took it to the correct temp. In general, what does cause the inside to be gummy?
Rick in CO @ 11:42 am
Oh, another question I had, Eric, was what adjustments, if any, are needed if one puts in other ingredients such as herbs, garlic, nuts, etc? Does it require more water to take up whatever the additional items might soak up?
Thanks again,
Rick in CO
John Summers @ 7:48 am
Hi Eric,
Well, I think the bread could have formed up better if I had it on parchment paper to proof. The proofing basket I got from ya, had to have the liner washed because of how much the dough stuck to it. I had heavily floured it before I put the dough in but it still stuck to it. I too like Rick, am trying to figure out the rules but the book by Peter Reinhart, The Bread Bakers Apprentice, is incredible. I am goingo to work with some of the bread bakers math and see if I can't get things to work out better. Another attempt this weekend. Oh, the bread is almost all gone. My family still ate it up even though it didn't rise up the way I wanted it to. Oh, I have the starter I got from you going quite well and my own starter is really thriving. When I smell each, yours smells sour like I would expect a sourdough starter to smell like. When I smell mine, it smells more like alcoholish to me. It is a whole wheat starter and I have been feeding it KA bread flour. I will use a lot of it up this weekend and maybe get it switched over to the white variety by next week. I will let you know. On another note. Since I discovered your web site and have had success in my baking, I have decided to take it to the next level. I am studing Peter's books to learn how to be a great baker and will be taking classes at KA. I plan on opening a bakery/Pizzaria in my town. I am going to specialize in wood fired pizza and breads. I have wanted to do this for a long time and think I can do it. I will keep ya'll updated on how its going. For Rick, according to Peter Reinhart, You have to maintain a certain percentage of flour and moisture in bread for it to come out right. I think my onion and cheddar loaf was way to moist. I plan on cutting back the water some but don't know how much yet. I am still reading his book. I am also getting a scale. No professional baker uses volume to measure their ingrediants. It is all by weight. That may also help you too. I know it is dry in CO, I lived there for 5 years. It does seem to impact cooking some. I will let you know what I find out as I read.
John In MO
breadtopia @ 8:10 am
John, a big congratulations to you on your plans to open up a bakery/pizzeria in your town! I wish you great success.
Rick in CO @ 8:40 am
Thanks for your comments, John. You know what it's like baking at alitude then! I'm experimenting too with the adjustments needed. Actually overall the results are wonderful with the NK method…I suppose I'm just looking to perfect it. What other ingredients have you all added with no adverse results? I know Eric has used olive, pecan, parmesan, oats, etc. I'd like to expand that to wheat berries, kamut, and more multi-grains for the NKB.
Good luck with your enterprise as it should be quite rewarding. I'd love to know what you end up doing in preparing the NKB with a large scale production such as if it works by doing one big batch and then cutting it into individual loaves.
Take good care.
Rick
breadtopia @ 8:44 am
Rick - I'm not really sure about any guidelines on adjusting for the addition of ingredients, other than general guesswork. Some are going to suck up moisture, some aren't.
Even when I add steel cut oats to the no knead recipe, which of course takes up quite a bit of moisture, I don't add extra water just because I like the way it turns out without any extra.
As for what causes gummy crumb, other than under baking, I'm not sure on that either. I remember hearing or reading something about that, but can't recall what it was. Big help, huh?
Bob n Kay @ 2:04 am
Great website Eric.
We bought a little NKB recipe book over 30 years ago and have been making NKB on and off ever since. Had a couple of bread makers in that time, but gave the last one away, we prefer the NKB.
We use wholemeal spelt flour, and bake in the traditional open top rectangular bakers pans.
The bread we turn out is quite heavy, but that's OK, my only complaint is that all of the crusts are just SO hard.
Any suggestions ?
Cheers
breadtopia @ 8:42 am
Hi Bob & Kay,
I don't have any experience to speak of with using all spelt flour. But as far as the hard crust goes, I suppose you could try some of the things others have tried with NYT no knead recipe.
If you're baking at a really high temperature (as is the case with NYT no knead), you could try lowering it.
If there's room to raise your oven rack a notch higher, do that.
Do you use an instant read thermometer to test when your bread is ready? It may be finishing sooner than you think.
You can also try adding a Tbs of oil to the recipe. That will soften the crust a little. Some people brush the crust with a little melted butter after it's come out of the oven.
The basic no knead recipe by nature tends to have a pretty thick (rustic) crust tending to the hard side.
You might love the new recipe (with video) I just added for the Cook's Illustrated Almost No Knead bread. The crust is much thinner yet still crispy.
Howie @ 7:25 am
Hi Eric,
I have a question for you about the Parmesan-Olive loaf.
What type of Kalamata olives do you use? I noticed oil cured, in water, and even other types as well. Which work the best?
Howie Cohen
Utica, NY
ps. And yes.. for special occasions only. The parm was a small fortune.
Barbara Ross @ 4:37 pm
What do you think would happen if we took any regular bread recipe and adapted it by using only 1/4 tsp of yeast and letting it rise for 18 hours. Has anybody tried any and can they post the recipes if they have?
BArb
Toni Van Duyne @ 11:36 am
Bob and Kay,
You can soften the bread crust by putting it in a ziplock bag while still hot the moisture will soften the crust quite a bit. Be careful not to make it too soft though! Hope it works out!
Toni
Howie Cohen aka The Neon Guy @ 9:23 am
Hi Eric,
You may have missed the question the first time around so here it goes again.
Tell me about the Kalamata Olives that you use for your bread. I think the oil cured would work best. Any thoughts?
Also how do you store your bread after you bake it? (assuming there is some left to keep) Once I cut into it, if I place it in plastic, I am sure the crust will soften.
I also don't want it to dry out.
Love the Pecan-Cran. I made it this weekend with along with a variation using walnuts, cinnamon and raisins.
Yum!
Howie Cohen
Utica, NY